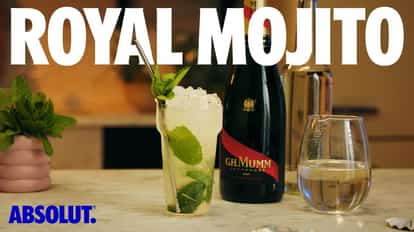
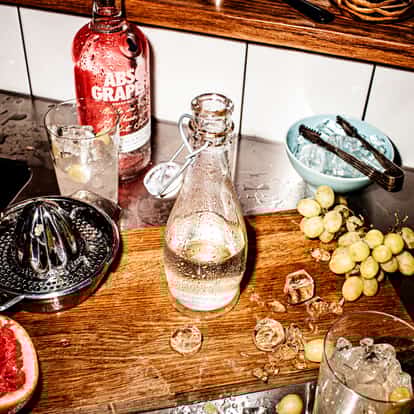
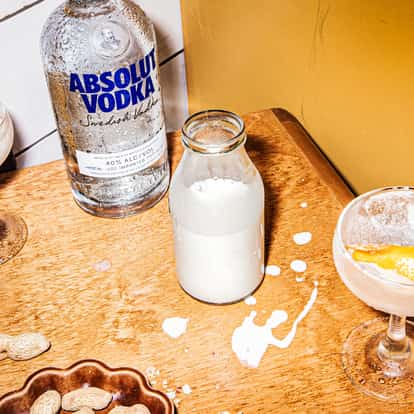
Royal Mojito
Average
Sour, Bubbly & Citrusy
3 Minutes
Highball Glass
Ingredients
The Royal Mojito is a rum cocktail that puts a refined spin on a classic Mojito cocktail recipe.
“It’s a Mojito with a champagne twist” explains Ricardo ‘Rico’ Dynan, Bartender and Absolut Global Brand Ambassador.
It mixes light rum, lime juice, sugar, and fresh mint leaves like the original, but the addition of champagne transforms it from a summer essential into a sophisticated sipper perfect for New Year’s Eve!
How To Make a ROYAL MOJITO COCKTAIL
Bar tools you’ll need
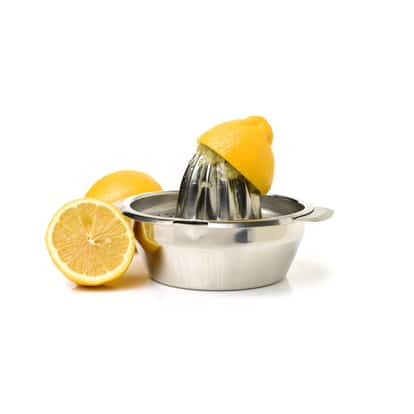
Citrus Press
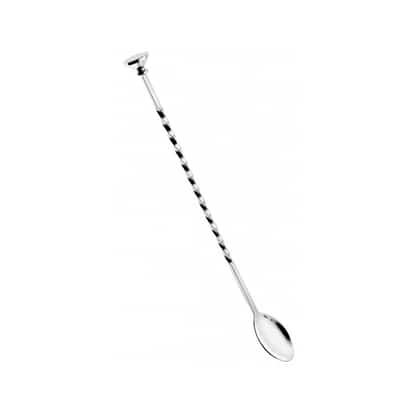
Bar Spoon

Jigger
How to Mix
-
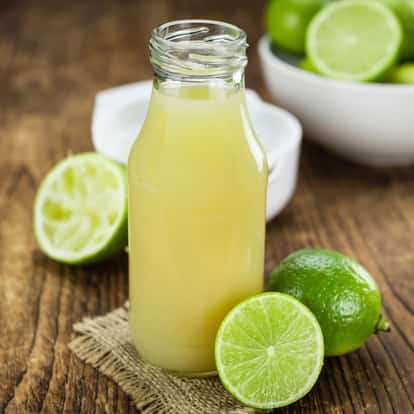
Cut lime in half and then use a citrus press to juice lime.
-
Use a jigger (or measuring instrument) to measure and pour lime juice into a highball glass.
-
Measure and add rich syrup.
-
Measure and add light rum.
-
Add mint leaves.
-
Add crushed ice.
-
Use a bar spoon to give everything a good “schmuddle”, lifting the ice up and down to evenly distribute the flavors.
-
Top up with champagne.
-
Add more crushed ice to create a crown.
-
Garnish with a mint sprig and serve with a drinking straw.
All about the Royal Mojito
A Royal Mojito, also known as a Mojito Royale, is a fancy twist on a classic Mojito cocktail adding champagne to the mix of light rum, lime juice, sugar and mint leaves
You get all the flavors of a classic Mojito – the perfect marriage of sweet and sour, where you can really taste all the elements: light rum, zesty lime juice, and fragrant mint. However, the champagne introduces a new dimension, offering a dry finish and an effervescent zing, making an already-refreshing-tasting cocktail even more refreshing-tasting!
The history of the Royal Mojito, or when a Mojito was first made with the addition of champagne, is undocumented, but it’s extremely likely a modern creation. To appreciate this variation, we must delve into the history of the Mojito itself. But even that’s not so clear…
You see, the exact origins of the Mojito are debated; however, many historians believe a version of the drink first emerged in the 16th century. The Mojito we recognize today, however, has Cuban roots. During the pre-revolution era, Cuba was like a tropical Las Vegas, attracting celebrities and tastemakers who helped popularize Mojitos around the globe.
Just as it has changed over the centuries, I guess you could say the Mojito continues to evolve, now including the elegant addition of champagne.
- Don’t muddle the mint
Contrary to popular belief, whatever you do, don’t muddle the mint leaves! “As soon as you start to do that, you’re going to start getting bitterness from the chlorophyll,” explains Ricardo ‘Rico’ Dynan, Bartender and Absolut Global Brand Ambassador. - Slap the mint leaves instead
That’s right, instead of muddling, “Just give the mint leaves a little slap,” advises Rico. - “Schmuddle” your drink
After you’ve added all your ingredients, give the drink a “scmuddle” – that’s Rico’s word for the technique that’s a cross between stirring and muddling.Using a bar spoon to give everything a good stir, blending the crushed ice with the ingredients in an up and down motion.
- Fresh lime juice only!
Grab a couple of fresh limes and use a citrus press (or citrus elbow) to produce lime juice. Fresh lime juice tastes infinitely better than store-bought bottled stuff. You’ll be amazed at how such a “little” detail can make such a big difference to your drink. - Choose your ingredients wisely
Your choice of ingredients will make a huge difference to your drink. Just as we recommend using fresh lime juice, choose your choice of champagne and light rum carefully.If you have a preferred light rum and champagne, use those to make your Royal Mojito. We recommend using a Brut champagne like G.H. MUMM but if you prefer sparkling wine over champagne, use that!
- Sparkling wine instead of Champagne
If you prefer, you can substitute champagne for sparkling wine. When choosing a sparkling wine, we recommend choosing one that’s dry with high acidity with minimal sweetness.
- Garnish your Royal Mojito with a mint sprig. While the drink itself already contains mint leaves, the sprig enhances the aroma, taking those minty notes to a whole new level.
- Serve your drink in a highball glass and insert a drinking straw placed right beside the mint sprig. This way, you’ll enjoy the full aroma of the mint as you sip. The mint aromas are key to this drink.

A very bougie twist on a classic cocktail.
Bartender and Global Brand Ambassador
Royal Mojito FAQ
Rich syrup is a mixture of sugar and water. To make it, follow the same recipe for simple syrup but change the ratio from 1:1 parts sugar and water to 2:1 parts sugar and water.
It comes down to personal taste, but we like G.H. MUMM champagne. Specific brands aside, we recommend selecting a Brut Champagne.
A Royale Mojito is also known as a Royal Mojito – it follows the same recipe as a classic Mojito but with the addition of champagne.
Explore similar drinks by ingredients


Average
Sweet & Creamy
4 Minutes
Cocktail Glass
Ingredients
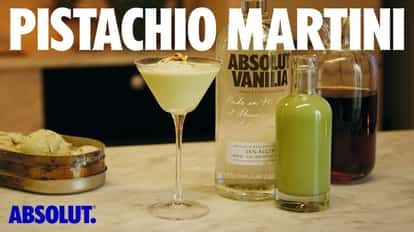
The Pistachio Martini is a dessert cocktail and a perfect drink to serve at New Year’s Eve when you really want to turn things up a notch in terms of decadence.
Made with vanilla-flavored vodka, amaretto, pistachio cream liqueur and a scoop of pistachio ice cream, it’s fair to say the Pistachio Martini bares little resemblance to a classic Dry Martini. But, hey, when a drink tastes this good, who’s complaining?
How To Make a PISTACHIO MARTINI COCKTAIL
Bar tools you’ll need
Boston Shaker

Hawthorne Strainer

Fine Strainer
Jigger
How to Mix
-
Use a jigger (or measuring instrument) to measure and add Absolut Vanilia into the smaller tin of a Boston shaker.
-
Add Amaretto.
-
Add pistachio cream liqueur.
-
Add ice cubes, connect the two shaker tins, and shake vigorously until the shaker is frosty on the outside.
-
Separate the Boston shaker, place a Hawthorne strainer over the larger tin, and strain out the ice into the smaller tin. Discard the ice.
-
Reassemble the shaker and shake again, this time without ice to emulsify.
-
Use an ice cream scooper to add one scoop of pistachio ice cream into a martini glass.
-
Open the shaker tins and pour the cocktail into the glass using a fine strainer.
-
Garnish with a pinch of pistachio nuts sprinkled directly into the glass.
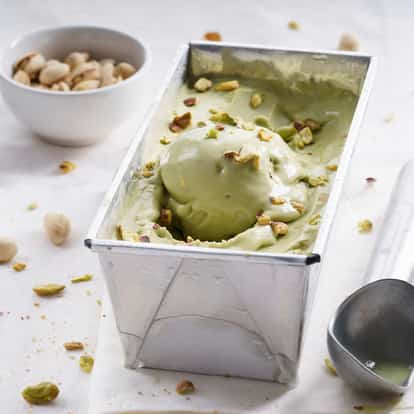
All about the Pistachio Martini
The Pistachio Martini is a decadent dessert-like shaken cocktail made with vanilla-flavored vodka, amaretto, and pistachio cream liqueur. A scoop of pistachio ice cream is placed in a chilled martini glass before the cocktail is poured in.
We don’t really need to tell you how incredible the flavors of marzipan, pistachio, and vanilla are, do we? Sweet, creamy, rich and oh-so-decadent!
The origins of the Pistachio Martini are disputed, but all signs point to Boston, Massachusetts as the birthplace. The timing, though, is up in the air.
Some say it popped up in the late 1990s, while one bar claims they invented it around 2014. Meanwhile, another bar owner insists he’s been serving a version since the 1980s.
The fact is every bar in Boston’s Little Italy seems to have a stake in its creation.
Since 2013, its popularity has surged thanks to social media.
- Chill your glassware
Place your martini glass in the freezer about 30 minutes before serving. A chilled glass is always a good idea!
- Add a splash of Blue Curaçao
Many Pistachio Martini recipes call for a splash of blue curaçao.to give the drink a striking blue-green hue, more for visual appeal than the orange flavor it adds. If you want to add blue curaçao., we recommend just a splash – half a teaspoon. - Frozen Pistachio Martini
Simply add all the ingredients into a blender, together with ice and blend on high. Now that’s dessert!
- Serving your Pistachio Martini in a chilled martini glass is essential.
- With a dollop of pistachio ice cream already in the mix, garnishing your drink isn’t really necessary, but a single pistachio nut adds the perfect final touch.
- If you really want to go all-out, top your drink with whipped cream!
Pistachio Martini FAQ
Vanilla-flavored vodka is essential for a Pistachio Martini. Call us biased, but we recommend Absolut Vanilia.
Vanilla-flavored vodka, amaretto, pistachio cream liqueur, and pistachio. Some recipes also include a splash of blue curaçao.
See the recipe on this page – it’s perfect for home bartenders of all levels.
IF YOU LIKE A PISTACHIO MARTINI, YOU MIGHT ALSO ENJOY THESE DESSERT COCKTAILS:

Explore similar drinks by ingredients

Pistachio Cream Liqueur

Average
Sweet & Creamy
1 Minute
Shot Glass
Ingredients
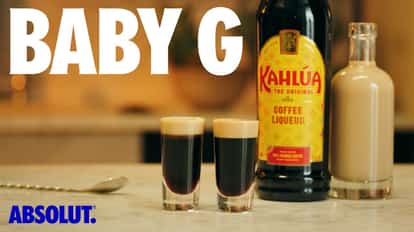
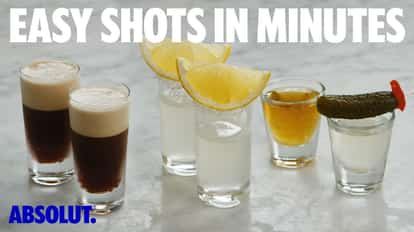
The Baby G is a very popular layered shot, especially in Ireland and the UK.
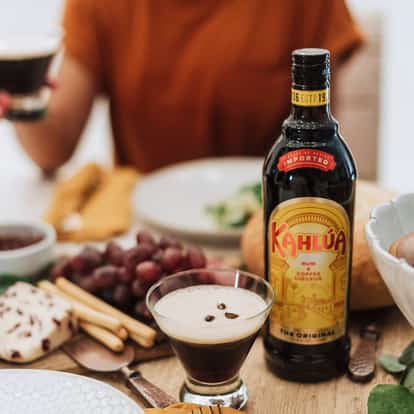
What looks like a miniature pint of Irish stout complete with a thick creamy head is, in fact, a creamy dessert shot consisting of coffee liqueur and Irish cream liqueur.
How To Make a BABY G SHOT
Bar tools you’ll need
Bar Spoon
How to Mix
-
Fill your shot glass ¾ full with Kahlúa (coffee liqueur).
-
Use the back of a bar spoon to gently pour Irish cream liqueur so it sits atop the Kahlúa.
All about the Baby G
The Baby G is a layered party shot made with coffee liqueur and an Irish cream liqueur float that resembles a miniature pint of stout.
Smooth and creamy. This tiny wonder combines the bold, rich flavor of coffee liqueur (Kahlúa is our go-to!) with the creamy sweetness of Irish cream liqueur with strong notes of vanilla.
The Baby G shot is believed to have originated in the late 1980s, often credited to a now-closed pub in Dublin.
Today, it remains as one of the most popular shots, especially in Ireland and the UK, frequently enjoyed at bars during nights out and at home parties.
- It’s all about the layering and illusion
This shot is just as much about presentation as it is taste. The goal is to make it look like a mini pint of stout, complete with a creamy head, as if you’ve taken a photo with tilt-shift lens on your camera.To achieve this, pour the Irish cream liqueur slowly and gently over the back of a spoon, allowing it to float on top of the coffee liqueur and form two distinct layers.
- Use Black Sambuca
Swap the coffee liqueur for black sambuca for an anise-flavored shot instead of coffee. It’s sure to surprise (and wow!) your guests! - Use caramel-flavored Irish cream
Create a shot that tastes like a caramel macchiato by using a caramel-flavored Irish cream liqueur. - Use salted caramel-flavored Irish cream
Imagine a coffee with salted caramel cream. Sounds divine, huh? it is! Simply swap regular Irish cream liqueur for a salted caramel-flavored Irish cream. Pure decadence!
- If you can find a shot glass shaped like a mini pint, it’ll take this eye-catching trick to a whole other level.
- If you can’t find shot glasses that resemble a pint, any other shot glass will work just fine.
- No need to garnish if you achieve that perfect creamy head.
A super-simple shot with just two ingredients.
Bartender and Global Brand Ambassador
Baby G FAQ
Irish cream liqueur and coffee liqueur.
Our preferred coffee liqueur is Kahlúa but, since this is your drink, you should use the one that you like best!
Explore similar drinks by ingredients


Pickleback
Easy
Spirit-forward & Sour
1 Minute
Shot Glass
Ingredients
The Pickleback is a popular shot enjoyed in two steps: first, a shot of whiskey, followed by a shot of pickle juice as a chaser.
Perfect for parties, the Pickleback shot requires zero effort and is quick to prepare. Though the idea of drinking pickle juice might sound unusual, it pairs fantastically with whiskey. What started out as a playful experiment at a bar in New York has become one of the most popular shots in the world.
How To Make a Pickleback shot
Bar tools you’ll need
Jigger
How to Mix
-
Add Jameson Irish Whiskey into a shot glass.
-
Add the pickle juice into a second shot glass.
-
Skewer a gherkin with a cocktail skewer (or toothpick) and place it across the top of the shot glass containing pickle juice.
-
Drink the whiskey shot first, then the pickle juice.
-
Eat the gherkin.
All about the Pickleback
The Pickleback is a popular two-step shot made with Jameson Irish Whiskey in one shot glass and pickle juice in another. First drink the shot of Jameson Irish Whiskey followed by the pickle juice.
Sweet yet savory. It starts with the smooth, sweet and woody flavor of Jameson Irish Whiskey, followed immediately by the salty, tangy brine of pickle juice.
The pickle juice acts as a chaser, cutting through the warmth of the whiskey’s leaving a tangy aftertaste.
The Pickleback is said to have been invented in 2006 at a bar in Brooklyn, USA.
As the story goes, the bar was adjacent to a pickle company, and some of their pickles were stored in the bar’s basement. One evening, a customer requested a shot of pickle juice with her vodka, sparking the bartender’s creativity. This led to the playful pairing of a shot of bourbon with a shot of pickle juice. The patrons loved it, and the combination quickly became an instant hit.
Once the drink made its way to Manhattan, Jameson Irish Whiskey replaced bourbon as the preferred whiskey, a choice that has endured to this day. Today, the Pickleback can be found all over the globe.
- Choose your whiskey wisely
While the original Pickleback featured bourbon, today’s standard is to serve it with Jameson Irish Whiskey, which pairs beautifully with the pickle juice. Of course, if you have a preferred whiskey, feel free to use that. - Choose the right pickle juice
Pickle juice is essentially made from cucumbers, vinegar, water, and salt and sugar. Some varieties may also contain seasonings such as garlic and dill, which are delicious. So, when choosing your pickle juice, start with your favorite jar of dill pickles.We recommend choosing a pickle juice that’s strong in taste. Some people like their pickle juice to be salty and garlicky, others prefer theirs to be less salty. Choose the one that you like best.
- Experiment with different whiskies
Simply swap the Irish Whiskey for other whiskey types to see how they pair with the pickle juice. For example, use Rye Whiskey for a spicier profile or Bourbon for a sweeter, smoother finish.
While garnish isn’t essential, you can add a fun touch by skewering a gherkin on a cocktail stick and placing it across the top of your shot of pickle juice. After you’ve shot your whiskey and pickle juice, eat the gherkin to really accentuate the sweet, salty and tangy flavors of pickle juice.
Enjoy – it is a delicious shot!
Bartender and Global Brand Ambassador
Pickleback FAQ
Whiskey. Specifically, Jameson Irish Whiskey.
The Pickleback. That’s the drink recipe you’re looking at right now!
Drink the shot of Jameson Irish Whiskey from one shot glass, then follow it with the pickle juice from the second shot glass.
It’s a great shot to serve at parties where the pickle juice smooths out the warmth of the whiskey, acting as a palate cleanser of sorts.
IF YOU LIKE THE PICKLEBACK, YOU MIGHT ALSO ENJOY THESE PARTY SHOTS:

Explore similar drinks by ingredients


Easy
Fruity & Bubbly
2 Minutes
Cocktail Glass
Ingredients
The Bellini is a classic brunch cocktail made with just two ingredients – peach purée and either champagne or prosecco.
Elegant and simple, the Bellini is one of those drinks that’s perfect for any celebrations or occasion. It’s also one of the easiest and quickest drinks to make.
How To Make a BELLINI COCKTAIL
Bar tools you’ll need
Bar Spoon
Jigger
How to Mix
-
Use a Jigger to measure and pour Peach Purée into a Tumbler Glass.
-
Gently pour Champagne (or Prosecco) gently into the glass until it reaches halfway.
-
Use a Bar Spoon to give your drink a gentle stir.
-
Gently pour in more Champagne (or Prosecco) all the way to the top while continuing to stir.

All about the Bellini Drink
A timeless two-ingredient Italian mixed drink made with champagne or prosecco and peach purée.
The sweet, fruity taste of peach purée works incredible with the crisp, slightly tart, bubbly notes of champagne or prosecco. The result is a lively, effervescent drink that perfectly balances sweetness and acidity.
The Bellini is said to have been created between 1934 and 1948 by the founder of a bar in Venice, Italy. Initially a seasonal specialty, the drink gained popularity in both Venice and New York after a French entrepreneur began shipping fresh white peach purée year-round.
A classic Bellini features Prosecco and puréed white peaches, served in a tumbler-style glass. The original recipe reportedly included a splash of raspberry or cherry juice for a pink hue. However, due to the limited availability of white peaches and Prosecco, Bellinis worldwide are often made with yellow peach purée and Champagne, served in champagne flutes.

- Use white peaches
If you want to make a traditional and classic Italian Bellini as they were intended to be made, you need to use white peaches as the base of your peach purée. White peaches bring a subtle, floral taste that perfectly plays off the crisp notes of Prosecco.
- Make your own peach purée
We recommend using canned peaches because it’s the easiest and quickest way to make your peach purée. However, you can use frozen or fresh peaches too.
If using canned peaches, strain them first but keep the syrup to one side in case you want to add some of the syrup later. Next, throw the peaches into a blender and blend on high until thick and smooth. Taste the mixture – if you want it sweeter, add a teaspoon or two of the canned syrup.
If you’re using fresh peaches, boil them for about 40 seconds, then peel and pit before blending. There’s no need to add sugar, as fruit already contains sugar. However, after tasting the mixture, if you would like it sweeter, you can add a teaspoon of sugar.There you have it – peach purée!
- Prosecco or Champagne
The Bellini is an Italian drink traditionally made with prosecco. However, it’s common to find restaurants and bars around the world that use champagne to add a more luxurious twist. Keep it classic or go contemporary – whichever you prefer – it’s your drink.
- Yellow peaches
Although an authentic Bellini from Italy uses peach purée from white peaches, yellow peaches are a great substitute due to their availability.If fresh yellow peaches aren’t available at your local grocery store, you’re likely to find yellow peaches frozen or canned. Yellow peaches offer a bolder taste and will result in a darker colored purée. Rest assured, they not only work perfectly as a substitute but many people even prefer their taste. - Bellini-tini
Here’s a peach-forward twist on a Bellini you need to try at your next event! A Bellini with vodka? You got it! As the name suggests, the Bellini-tini is a cross between a Martini and Bellini. It mixes vodka, white peach purée, peach liqueur and a dash of peach bitters.
Here’s how to make a Bellini-tini.
- As Rico points out, contrary to popular belief, Bellinis should be served in tumbler glasses, not champagne flutes. Originally crafted in Italy with Prosecco, Bellinis were traditionally served in tumblers, not flutes.
- No garnish required – the bubbles offer enough celebration!
- If you really want to garnish your Bellini, you could go with a peach slice and/or a sprig of fresh mint.
Bellini cocktail FAQ
No, a Bellini is made with prosecco or champagne and peach purée whereas a Mimosa is made with champagne and orange juice.
A Bellini is crisp, fresh and fruity, leaning more towards the sweeter side due to the peach purée.
Explore similar drinks by ingredients


Average
Creamy & Sweet
2 Minutes (plus 48 h prep time)
Milkshake Glass
Ingredients
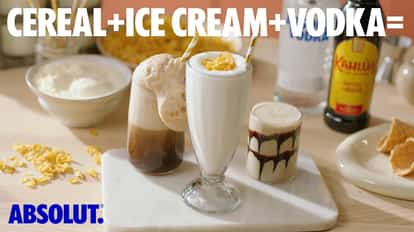
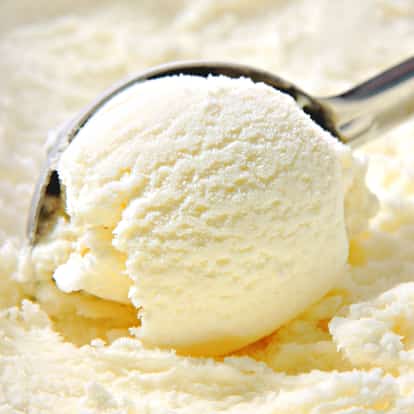
The Cornflake Milkshake is a delicious non-alcoholic drink that’s reminiscent of that last bit of milk and cornflakes you find at the bottom of your cereal bowl. Mmm, mmm!
“It’s been on my mind for many, many years – inspired by a drink from one of London’s most famous steakhouses,” shares Ricardo ‘Rico’ Dynan, Bartender and Absolut Global Brand Ambassador.
Though it only has two ingredients, making the homemade Cornflake Ice Cream takes some prep time. We recommend setting aside two days for it. But oh my, it’s worth the wait!
How To Make a CORNFLAKE MILKSHAKE
Bar tools you’ll need
Jigger
Blender
How to Mix
-
Day one – Preparing the cream
-
Take a Large Glass Bowl and pour in half a liter of Whipping Cream (e.g. 40% fat).
-
Add 50 g of Cornflakes and stir the mixture thoroughly.
-
Put the Bowl in the refrigerator overnight.
-
Day two – preparing the ice cream
-
Remove the Bowl from the fridge.
-
Use a Sieve to strain the mixture into a Medium-Sized Bowl, pressing down on the Cornflakes with a spoon to extract all the Cream.
-
Use an Electric Eggbeater to whisk the Cream until it becomes fluffy with stiff peaks.
-
Pour in half a liter of Condensed Milk and stir well.
-
Pour the mixture into a Large Glass Container and freeze overnight.
-
Day three – making the drink
-
Measure and pour Milk into a Blender.
-
Use an Ice Cream Scoop to add two scoops of Cornflake Ice Cream into the Blender.
-
Blend on high for several seconds, then pour the mixture directly into a Milkshake Glass.
-
Garnish with a handful of Cornflakes, then place a straw into the glass.
ALL ABOUT THE CORNFLAKE MILKSHAKE
The Cornflake Milkshake is a non-alcoholic drink made with homemade cornflake ice cream and milk. Made famous by a steakhouse in London, it’s the ultimate weekend treat for kids and adults.
Just as you hope and expect – cornflakes and milk. It’s like a bowl of cornflake cereal in milkshake form. Yum!
The Cornflake Milkshake may not have a well-documented origin or history, but it was made famous thanks to a London steakhouse that opened in 2006, which might have even been its birthplace.
Ricardo ‘Rico’ Dynan, Bartender and Absolut Global Brand Ambassador drew inspiration from the steakhouse and decided to recreate the milkshake for an episode of Absolut Drinks with Rico in the spring of 2025.
- Choose your favorite brand of Cornflakes
Not all Cornflakes are the same! So, we recommend using your favorite brand of Cornflakes for both the Ice Cream and the garnish. - Take the Ice Cream out in advance
Once you’ve frozen the Ice Cream, it will be quite solid. To make scooping easier, take the Ice Cream out of the freezer before you plan to make your Milkshake.
Serve the Cornflake Milkshake in a Milkshake Glass with a straw and garnish with a handful of crunchy Cornflakes.
This drink has always been an all-time classic!
Bartender and Global Brand Ambassador
Cornflake Milkshake FAQ
Yes. When making your Cornflake Ice Cream, use a plant-based whipping cream instead of regular whipped cream. For example, you could try whipping cream made from oats, soy or almonds. Similarly, instead of using dairy milk, use your favorite plant-based milk.
IF YOU ENJOY THE CORNFLAKE MILKSHAKE, YOU MIGHT ALSO LIKE THESE MILKY DRINKS:

Explore similar drinks by ingredients

Average
Sweet, Creamy & Bubbly
2 Minutes (plus 48 h prep time)
Milkshake Glass
Ingredients
The Cornflake Cola Float is a non-alcoholic drink that captures the retro charm of a 1950s diner.
It’s creamy and indulgent with just two ingredients. First up, you’ll need to make some Cornflake Ice Cream. The best part is you don’t need an Ice Cream Maker.
This drink requires a bit of prep, so it’s best to plan for two days. First, you’ll need to refrigerate the Cornflakes and Whipped Cream overnight. Next, you’ll need to strain it, whip the mixture, add Condensed Milk and then freeze your newly Cornflake-infused Ice Cream for another night.
Since it takes a little time, let’s get started right away!
How To Make a CORNFLAKE cola float
Bar tools you’ll need
Day One – Preparing the Cream
-
Take a Large Glass Bowl and pour in half a liter of Whipping Cream (e.g. 40% fat).
-
Add 50 g of Cornflakes and stir the mixture thoroughly.
-
Put the bowl in the refrigerator overnight.
Day Two – Preparing the Ice Cream
-
Remove the bowl from the fridge.
-
Use a Sieve to strain the mixture into a Medium-Sized Bowl, pressing down on the Cornflakes with a spoon to extract all the Cream.
-
Use an Electric Eggbeater to whisk the Cream until it becomes fluffy with stiff peaks.
-
Pour in half a liter of Condensed Milk and stir well.
-
Pour the mixture into a Large Glass Container and freeze overnight.
Day Three – Making the Drink
-
Take a Tall Drinking Glass and fill it ¾ full with Cola.
-
Remove your Cornflake Ice Cream from the freezer.
-
Use an Ice Cream Scoop to add one scoop of Cornflake Ice Cream into the glass.
-
Place a Drinking Straw in the glass and stir.
ALL ABOUT THE CORNFLAKE COLA FLOAT
The Cornflake Cola Float is a non-alcoholic beverage made with two ingredients – homemade cornflake ice cream and cola.
Creamy, indulgent and reminiscent of the kind of floats or milkshakes you’d find in a 1950s American diner. Cornflakes, creamy milk with the distinct caramel-like notes of cola, the Cornflake Cola Float is heavenly.
While the exact history of the Cornflake Cola Float is unknown, the Cola Float is thought to have been invented in Philadelphia, Pennsylvania, back in 1874.
Legend has it that a soda fountain operator ran out of flavored sodas and decided to combine ice cream with the leftover soda water, thus inventing the first ice cream float.
The Cornflake Cola Float was made for an episode of Absolut Drinks with Rico in the spring of 2025.
- Use your favorite Cola
Got a favorite brand of Cola? Then, that’s the one to use! When you’re making a drink with just two ingredients like this one, the quality of your ingredients will be the difference between an amazing drink and a so-so drink. - Allow time for your ingredients to refrigerate properly
You can’t rush this recipe. Trust us, it’s worth the wait. First, you need to refrigerate the cornflakes and whipped cream overnight.The next day, you’ll need to strain and whisk the mixture, then add condensed milk before freezing your newly cornflake-infused ice cream for another night.
Traditional Cola Float
A classic Cola Float uses Vanilla Ice Cream instead of Cornflake Ice Cream. It’s a recipe that has been used for over one hundred years.
Short on time? Use store bought Vanilla Ice Cream, and you can whip up a Cola Float in seconds!
Serve the Cornflake Cola Float in a Milkshake Glass with a straw for that classic 1950s diner vibe.
Oh my days, this is a real winner guys!
Bartender and Global Brand Ambassador
Cornflake Cola Float FAQ
t really depends on the size of your glass! A typical can or bottle of Cola ranges from 300 ml to 375 ml. Just fill your glass about three-quarters full, and you’ll be good to go.
IF YOU ENJOY THE CORNFLAKE COLA FLOAT, YOU MIGHT ALSO LIKE THESE MILKY DRINKS:

Explore similar drinks by ingredients
Cornflake Ice Cream

Average
Fruity & Sour
3 Minutes (plus 24 h prep time)
Coupe Glass
Ingredients
The Sherbet Martini is a deliciously sophisticated summer vodka cocktail.
First thing’s first, the Sherbet Martini is easy to make but it takes a little bit of preparation. Specifically, once you’ve prepared your Lime Oleo Saccharum (Latin for oil-sugar), it’ll need to sit overnight.
But after that’s done, you’re ready to mix!
How To Make a SHERBET MARTINI
Bar tools you’ll need
Fine Strainer
Hawthorne Strainer
Jigger
Boston Shaker
Day One – Make the Lime & Passionfruit Sherbet
-
- Wash your Limes thoroughly, then peel them, taking care to avoid as much of the white pith as possible. Once washed and peeled, place the peels in a Mason Jar.
-
2. Mix equal weight caster sugar to the peels.
-
3. Seal the jar and let it sit for 24 hours at room temperature, stirring occasionally.
The clear citrus oil on top of the sugar after 24 hours is what’s called Oleo saccharum.
-
4. Add an equal volume of Passion Fruit Purée to the Oleo Saccharum in the jar. Reseal the jar and shake until the sugar dissolves.
-
5. Strain and store in an airtight container in the refrigerator until you’re ready to make the cocktail.
Day Two – How to Mix
-
Use a Jigger to measure and pour Lime & Passionfruit Sherbet into the smaller tin of your Boston Shaker.
-
Measure and pour Absolut Peppar into the Shaker.
-
Fill your Shaker with Ice Cubes and shake lightly, not too heavily, until cold.
-
Place your Hawthorne Strainer over the top of the larger tin of your Boston Shaker and then pour the cocktail through a Fine Mesh Strainer into your Martini Glass or Coupe Glass.
-
Top up with Champagne.

ALL ABOUT THE SHERBET MARTINI
The Absolut Sherbet Martini is a shaken vodka cocktail made with Absolut Peppar and homemade lime and passionfruit sherbet.
The sherbet takes a little time to prepare as the mixture of lime peels and sugar needs to sit in the refrigerator for 24 hours.
However, once that’s ready, the Absolut Sherbet Martini is an easy-to-make cocktail and one of the best modern martinis you’re likely to find.
It tastes absolutely incredible. There’s the distinct taste of fresh cracked black peppercorns, mixed with the citrusy and tart lime and passionfruit sherbet, which then mixes with the crisp, bubbly and slightly tart champagne. It’s an absolute delight to sip.
The Absolut Sherbet Martini is a new cocktail that was created by the Absolut Drinks team for an episode of Absolut Drinks with Rico in the spring of 2025.
- Make your own Passionfruit Purée
To make Passionfruit Purée, add the pulp of a few Passion Fruits to a Blender, along with one teaspoon of water per fruit and sugar to taste. Blend then strain the mixture through a Fine Mesh Sieve.Alternatively, as Rico suggests, you can use Frozen Passionfruit and blend it with sugar. It’s up to you!
- Double strain your drink
No one wants ice shards or Passion fruit seeds in their drink. So, we recommend double straining your cocktail.
To do this, place your Hawthorne Strainer over the top of the larger tin of your Boston Shaker and then pour the cocktail through a Fine Mesh Strainer into your Martini Glass or Coupe Glass. Learn how to double strain your cocktail.
Use Passionfruit Vodka
If you love the taste of Passionfruit in your Sherbet Martini, turn it up by swapping out Absolut Peppar for Absolut Passionfruit. What you miss in pepper and spiciness, you’ll make up for with tartness and sweetness.
- We recommend using a large Martini Glass or a Coupe Glass to serve your Sherbet Martini.
- No need to garnish – your drink is already topped off with Champagne!
Passionfruit, black pepper, smoothed out by champagne – you’re not going to get a much better drink than this!
Bartender and Global Brand Ambassador
Sherbet Martini FAQ
- Wash your Limes thoroughly, then peel them, taking care to avoid as much of the white pith as possible, and place the peels in a Mason Jar.
- Mix equal weight caster sugar to the peels.
- Seal the jar and let it sit for 24 hours at room temperature, stirring occasionally.
- The clear citrus oil on top of the sugar after 24 hours is your Oleo saccharum.
- Add an equal volume of Lime Juice to the Oleo Saccharum in the jar. Reseal the jar and shake until the sugar dissolves.
- Strain and store in an airtight container in the refrigerator.
Explore similar drinks by ingredients

Easy
Creamy & Sweet
4 Minutes
Rocks Glass
Ingredients
The Frozen Banana Mudslide is a decadent milkshake cocktail that’s every bit as rich and indulgent as you imagine.
“I’m not gonna lie – that is delicious!” says Ricardo ‘Rico’ Dynan, Absolut Global Brand Ambassador. Believe me, he’s not lying.
The Frozen Banana Mudslide is an easy-to-make dessert cocktail and a twist on a traditional Mudslide…but even more decadent. Just like the original, the Frozen Banana Mudslide features equal parts Absolut Vodka, coffee liqueur, and Irish cream liqueur but adds vanilla ice cream, fresh banana, and chocolate sauce for more decadence.
It’s the perfect after-dinner drink. As Rico suggests, if you’re not in the mood for a big dessert, serve your guests one of these instead!
How To Make a Frozen banana mudslide
Bar tools you’ll need
Jigger
Blender
How to Mix
-
Use a Jigger to measure and pour Irish Cream Liqueur into your Blender.
-
Measure and pour Kahlúa into the Blender, followed by Absolut Vodka.
-
Add half a Banana into the Blender.
-
Use an Ice Cream Scoop to add two scoops of Vanilla Ice Cream.
-
Blend on high until the Banana is completely pulverized.
-
Take a Rocks Glass and swirl Chocolate Sauce around the inside of the glass.
-
Pour your cocktail from the Blender directly into the glass.
ALL ABOUT THE FROZEN BANANA MUDSLIDE
The Frozen Banana Mudslide is a luscious variation of a classic Mudslide cocktail but frozen and even more decadent. It’s a blended cocktail made with vodka, coffee liqueur, Irish cream liqueur, vanilla ice cream and fresh banana. To top it all off, the glass is drizzled with rich chocolate sauce before the cocktail is poured in.
Like the desert you’ve always dreamed of. Imagine this – the taste of chocolate, vanilla, coffee, and banana, frozen with an incredible soft and creamy mouthfeel. Could there be a better desert cocktail?
The Frozen Banana Mudslide is a twist on the classic dessert cocktail, the Mudslide. Legend has it that the Mudslide originated in the 1970s at a bar on Grand Cayman Island.
Ricardo ‘Rico’ Dynan, Bartender and Absolut Global Brand Ambassador made the Frozen Banana Mudslide for an episode of Absolut Drinks with Rico in the spring of 2025.

Choose your favorite liqueurs
A great drink is all about the quality of the ingredients. So, if you have a favorite Coffee Liqueur, use that. Personally, we love Kahlúa.
Likewise, if you have an Irish Cream Liqueur, use that. Finally, choose your favorite brand of Vanilla Ice Cream.
- Use Plant-Based Ice Cream
If you prefer, you can replace dairy-based Vanilla Ice Cream for Plant-Based Vanilla Ice Cream. Whether it’s made from Soy, Almonds or Oat Milk, the choice is yours! - Frozen Mudslide
You’ve got to give credit where credit is due! The inspiration for the Frozen Banana Mudslide is, of course, the Mudslide. But more specifically, the Frozen Mudslide.The Frozen Mudslide has the same ingredients as the Frozen Banana Mudslide but without the banana, served in a Milkshake Glass topped with Whipped Cream. Check out our Frozen Mudslide recipe.
Unlike a traditional Mudslide, which is often served in a Milkshake Glass, we recommend serving the Frozen Banana Mudslide in a Rocks Glass that’s been drizzled with Chocolate Sauce. No need to add a garnish as it’s decadent enough!
I wanted to make this one a little bit thicker, a little bit smaller and a little more indulgent than your usual Mudslide.
Bartender and Global Brand Ambassador
FROZEN BANANA MUDSLIDE FAQ
Vodka, coffee liqueur, Irish cream liqueur, fresh banana and vanilla ice cream.
Yes, you can and it works just as well. Simply replace dairy vanilla ice cream for a plant-based vanilla ice cream.
´Our preference is Kahlúa but use whichever coffee liqueur is YOUR favorite.
Explore similar drinks by ingredients


Average
Spicy, Creamy & Sweet
5 Minutes
Jug Glass
Ingredients
The Hot Lime Mule is a twist on a Moscow Mule cocktail made with lime-flavored vodka and spiced apple juice, served warm and topped with heavy vanilla cream.
Creamy, citrusy, warming with a delicious spiciness, this easy-to-make Mule variation is a perfect winter warmer.
We’ll start by making the warm spiced apple juice, then whip up the cream, and finally, we’ll build the drink into the glass. Ready? Let’s get to it.
How To Make a hot lime mule
Bar tools you’ll need
Jigger
Bar Spoon
Boston Shaker
How to Mix
-
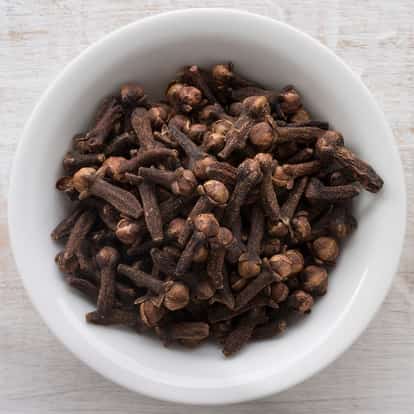
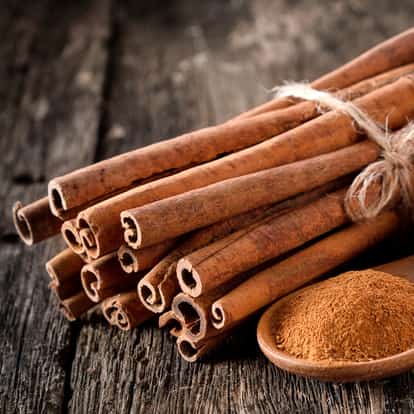
Make the Hot Spiced Apple Juice by adding a pinch of Cloves to a Saucepan.
-
Add a couple of Cinnamon Sticks, a pinch of Cardamom, and a couple of Star Anise.
-
Cut up some fresh Ginger and add a few large Ginger slices into the Saucepan.
-
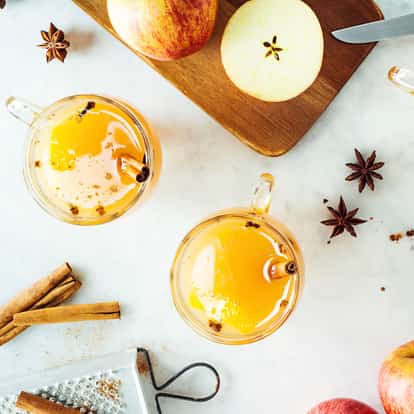
Measure and pour Apple Juice into the Saucepan.
-
Bring the mixture to a boil, then let it simmer.
-
Use a Sieve to strain the mixture into a Large Bowl.
-
Use a Jigger to measure and pour Absolut Lime into a heat-safe Jag Glass.
-
Measure and pour the Hot Spiced Apple Juice into the Glass.
-
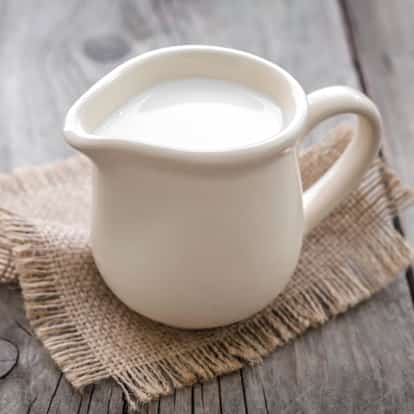
Prepare the Vanilla Cream by pouring Vanilla Syrup into your Cocktail Shaker.
-
Add Heavy Whipped Cream to the Shaker and shake to aerate.
-
Use the back of a Spoon to slowly pour the Whipped Cream into your Glass.
-
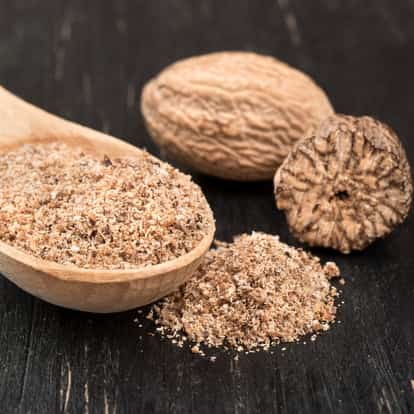
Garnish by grating fresh Nutmeg on top.
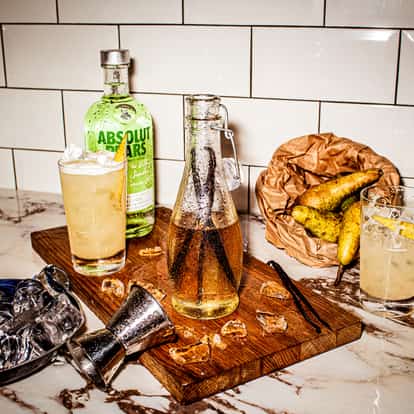
ALL ABOUT THE HOT LIME MULE
The Hot Lime Mule is a vodka cocktail served warm and made with lime-flavored vodka, vanilla cream, and warm spiced apple juice with cinnamon, ginger cardamom, nutmeg, and star anise as the spices. It’s a winter twist on a Mule cocktail.
Deliciously spicy, warming and wonderfully decadent, a Hot Lime Mule boasts flavors of lime, apple pie, ginger, cardamom, and nutmeg. And then there’s the vanilla cream. Oh my!
Who’d have thought a Mule cocktail would be the perfect drink to sip during fall and winter?
The Hot Lime Mule is a new cocktail created by the Absolut Drinks team for an episode of Absolut Drinks with Rico in the spring of 2025.
The Hot Lime Mule was inspired by the classic Moscow Mule that dates back to the 1940s.
Sweeten to your liking
You’ll see Rico doesn’t measure the Vanilla Syrup when he pours it into the shaker. However, he uses roughly 10 ml or two teaspoons.
Feel free to adjust the Vanilla Syrup to suit your taste—it’s your drink, so make it just the way you like it.
Looking for the best Moscow Mule variations and different types of Moscow Mules? Check out our Moscow Mule collection!
- Unlike a traditional Mule, which is served in a Copper Mule Mug, we recommend serving the Hot Lime Mule in a heat safe Jug Glass aka Toddy Glass (i.e. a glass with a handle), which is commonly used to serve an Irish Coffee.
- Garnish with fresh grated nutmeg. Delicious!
This one is banging! Ginger, apple pie, cream, nutmeg. It’s like a warm little cozy hug.
Bartender and Global Brand Ambassador
Hot Lime Mule FAQ
Of course! If you prefer Plant-Based Whipping Cream, feel free to use it. Just ensure it thickens when shaken and can be poured over the back of a spoon into your glass.
Absolutely! Although Rico uses a Cocktail Shaker in the video, the truth is you can just use a Jar with a lid or a similar container. It’ll work just fine.
Follow our recipe for Simple Syrup then add half a teaspoon of Vanilla Extract.
Vanilla Extract is made from real Vanilla Beans soaked in alcohol and water, giving it a great natural flavor.
You can use Vanilla Essence as an alternative, but keep in mind it’s a processed product with artificial flavors and colors. We recommend using Vanilla Extract for the best taste.